
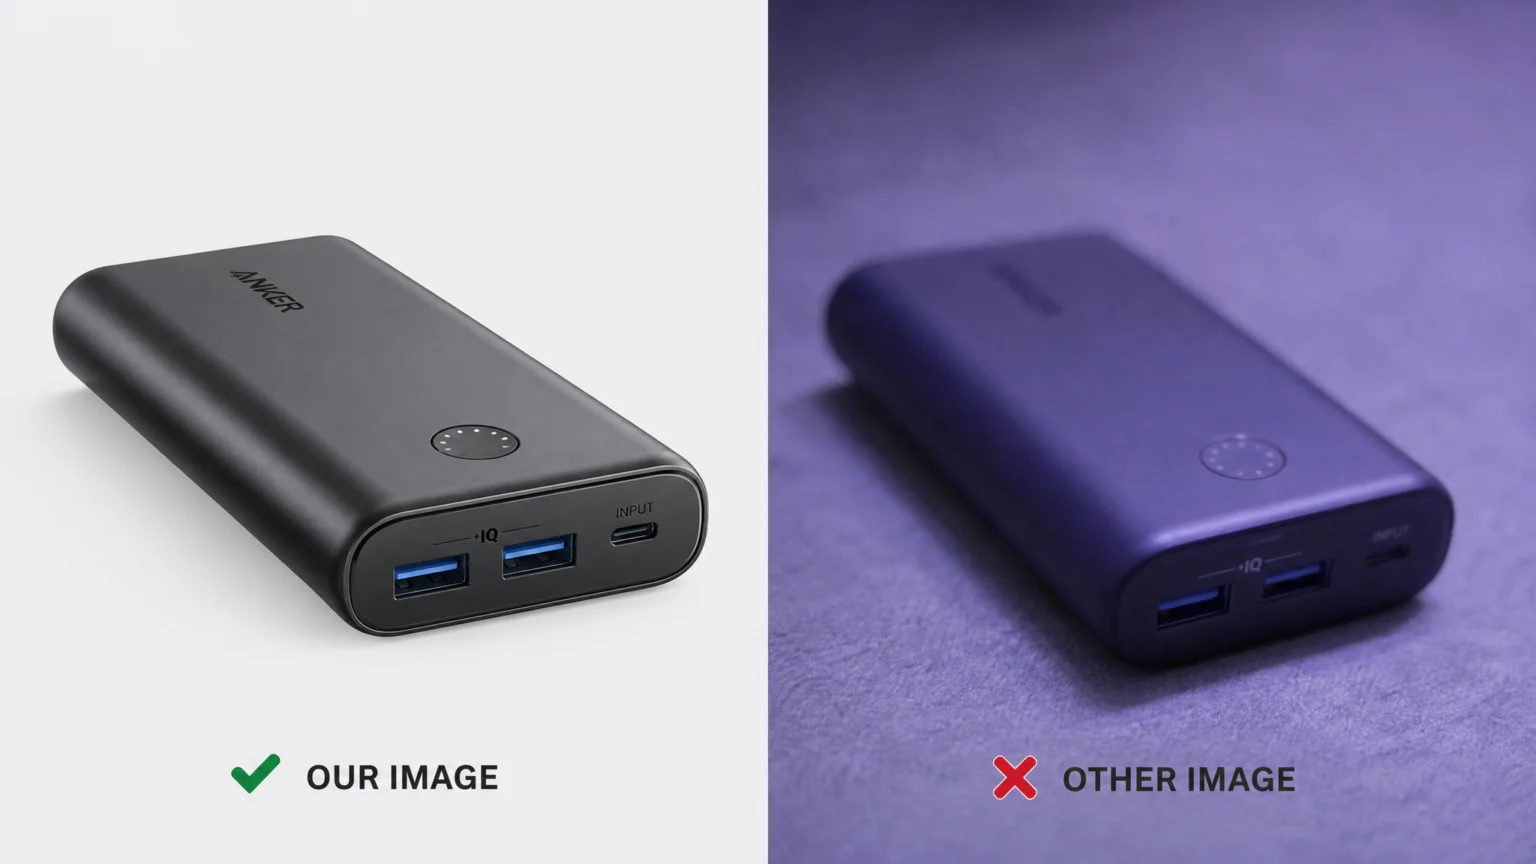
Imagine a customer browsing your online store, ready to click ‘add to cart’ for a new espresso machine. They zoom in on the product image, expecting to see crisp details of the stainless steel finish and the precise calibration marks. Instead, the image is slightly blurry, the silver looks dull gray, and a harsh reflection obscures the brand logo. This isn’t just a minor inconvenience; it’s a direct barrier to purchase. When visual information is compromised, trust erodes, and potential sales evaporate.
The good news is that many common issues with product photo clarity stem from a few predictable errors in capture, lighting, or post-processing. Identifying these specific problems allows for targeted fixes that can significantly improve your visual presentation and, by extension, your conversion rates. Let’s explore the five most frequent culprits behind unclear product photos and how to resolve them.
1. Unsharp Images and Motion Blur

One of the most immediate signs of a poor product photo is a lack of sharpness. This often manifests as soft edges or a general blurriness that makes details indistinct. The primary culprits are usually camera shake or incorrect focus. For instance, a close-up of a delicate piece of jewelry needs every facet to be in sharp focus. If the camera moves even slightly during exposure, those intricate details become a soft, indistinct blob.
To combat camera shake, a tripod is an essential tool. It stabilizes your camera, preventing the subtle movements that introduce blur, especially in lower light conditions or with slower shutter speeds. For consistent sharpness, ensure your camera is properly focused on the most important details of your product. Many modern cameras offer various autofocus modes; experiment to find the one that best suits your setup and product type. Even a slight wobble can degrade the visual information a customer needs to assess quality. Consider a remote shutter release or a camera’s self-timer to avoid introducing shake when pressing the shutter button.
2. Inaccurate Color Reproduction
Colors that don’t match the actual product can lead to customer dissatisfaction and returns. This issue often stems from incorrect white balance settings or limitations in the image file format. For example, a vibrant red dress appearing as a muted, orange-red on screen will inevitably disappoint a customer expecting the true hue. This discrepancy can be particularly problematic for products where color accuracy is paramount, like cosmetics or apparel.
Setting your camera’s white balance to match your light source is critical for accurate color. Whether you’re using natural daylight, studio strobes, or continuous LED lights, manually setting the white balance (or using a custom white balance card) ensures that white objects appear white, and all other colors render truthfully. Shooting in RAW format also provides more flexibility for color correction during post-processing. RAW files retain more image data than JPEGs, allowing for precise adjustments without introducing artifacts or color banding. This extra data gives you a wider latitude to correct color shifts that might occur during capture, ensuring the online representation closely matches the physical product. For web display, always convert to sRGB to ensure consistent color across different browsers and devices.
3. Harsh Lighting and Distracting Reflections
Poor lighting can obscure details, create unflattering shadows, or produce glare that makes a product look cheap or difficult to discern. Hard light sources often lead to these problems. Imagine trying to showcase a glossy smartphone with a bright, undiffused light source. The result would likely be a blinding hotspot on the screen and harsh shadows that hide the phone’s sleek profile, making it difficult for a customer to appreciate its design.
Soft, diffused light is widely recommended for product photography because it minimizes harsh shadows and reduces reflections. You can achieve diffusion using softboxes, umbrellas, or even simple white sheets placed between your light source and the product. This creates an even illumination that highlights textures and forms without creating distracting hot spots. A clean, consistent background also helps ensure the product remains the central focus, preventing visual clutter from competing with the item itself. This allows the light to define the product’s shape and material without interference. For highly reflective items, consider using a light tent or positioning your product to reflect a large, soft light source, minimizing pinpoint glare.
4. Excessive Noise and Grain
Digital noise appears as random speckles or grain, particularly in darker areas of an image. It can make a photo look unprofessional and reduce perceived detail, even if the image is technically in focus. For instance, a product shot of a dark leather wallet might show distracting colored speckles in the shadows if the ISO is too high, making the texture of the leather appear rougher and less luxurious than it is in reality.
The primary cause of noise is a high ISO setting. Keeping your ISO as low as possible (typically ISO 100 or 200) is crucial for cleaner images with less grain. If you need more light, adjust your aperture, shutter speed, or add more physical light to your setup before increasing ISO. While some noise reduction can be applied in post-processing, it’s always best to capture a clean image from the start. Adobe Camera Raw, for instance, provides sharpening controls that adjust edge definition and noise reduction sliders to smooth out grain. When evaluating these adjustments, Adobe recommends zooming your preview to at least 100% to accurately assess fine details and noise levels. This close inspection helps you find the balance between reducing noise and retaining important product textures. Over-applying noise reduction can lead to a plastic-like, artificial look, so subtle adjustments are key. Another useful checkpoint is Sharpening and noise reduction in Camera Raw – Adobe Help Center.
5. Suboptimal Post-Processing and Export
Even a perfectly captured image can lose its impact if not processed and exported correctly. Incorrect sharpening, over-compression, or wrong color profiles can degrade quality. Imagine a meticulously photographed ceramic vase, perfectly lit and focused. If the image is then over-sharpened, it might develop distracting halos around its edges, or if saved with too much compression, the smooth glaze could appear pixelated and blocky, losing its delicate appeal.
After addressing initial capture issues, careful post-processing refines your images. Sharpening should be applied judiciously to enhance edge definition without creating halos or artifacts. As mentioned, Adobe’s tools allow for precise control over sharpening and noise reduction. When saving images for web use, choose appropriate compression settings. While JPEG is common, excessive compression can lead to visible artifacts and a loss of detail. Aim for a balance between file size and visual quality. Many platforms, like BigCommerce, offer guidance on optimal image sizes and compression for their storefronts. Finally, ensure your images are exported with the correct color profile (sRGB is standard for web) to maintain color consistency across different browsers and devices. This final step ensures that all your efforts in capture and editing translate into a clear, accurate image for your customers.
Making Your Product Photos Work Harder
By systematically addressing these five common errors, you can significantly improve the clarity, color accuracy, and overall visual appeal of your ecommerce product photos. Each adjustment, from camera stability to file export, contributes to a more trustworthy and engaging product presentation. Remember, your product photos are often the first, and sometimes only, interaction a customer has with your product before purchase. Investing time in these fixes isn’t just about aesthetics; it’s about building confidence and driving sales. Regularly review your product imagery, perhaps even asking for feedback from others, to ensure your visuals are always working to their full potential.
 Photo Template
 Icon Template
 Logo Template
 Icon Template